How to install wpc wall panel
Dec 24, 2024
Preparation before installation
Wall treatment: Make sure the wall is clean, dry, flat, and free of dust, oil, cracks and other defects. If necessary, repair and level it. The humidity must be below 12%.
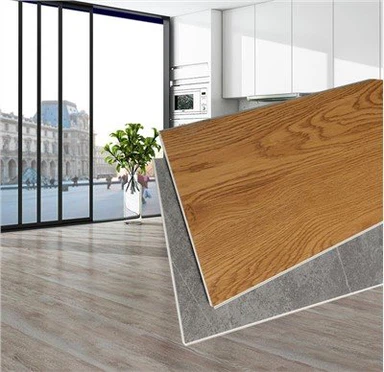
Material selection: Select WPC wall panels of appropriate size, color, and texture and supporting auxiliary materials such as U-shaped grooves, screws, adhesives, etc. according to your needs.
Tool preparation: Prepare tools such as tape measure, pencil, level, saw, glue gun, screwdriver, rubber hammer, etc.
Measurement and cutting
Measurement: Accurately measure the height and width of the wall, as well as the position and size of openings such as doors and windows, calculate the number and size of the required wall panels, and consider the expansion joints between the wall panels. Generally, a gap of 3-5mm should be reserved between each wall panel.
Cutting: According to the measurement results, use a saw to cut the wall panel to ensure that the cut is flat and vertical to ensure the installation effect.
Installation method
Direct pasting method: suitable for flat walls. First, apply adhesive evenly on the wall and the back of the wallboard. Starting from the corner, slowly stick the wallboard to the wall and compact it to ensure that the wallboard fits tightly with the wall to avoid bubbles and hollows. During the installation process, pay attention to keeping the wallboard horizontal and vertical.
Nailing method: It can be used when the wall is uneven or the wallboard is large. First determine the position of the nails at the edge of the wallboard. Generally, at least 3-4 nails are installed at each edge. The nails need to be nailed into the wall to a sufficient depth to ensure that the wallboard is firmly fixed on the wall, but be careful that the nails cannot be exposed from the surface of the wallboard, which affects the appearance.
U-shaped groove installation method: First fix the U-shaped groove on the wall to ensure that the installation position is accurate, then insert the WPC wallboard into the U-shaped groove, and use screws to fix the wallboard on the U-shaped groove. The screws should be tightened to prevent the wallboard from loosening.
Tongue and groove connection installation method: Some WPC wallboards have a tongue and groove structure. When installing, first apply adhesive to the tenon or groove of the wallboard, then insert the tenon of one wallboard into the groove of the adjacent wallboard at a certain angle, and then gently tap and compact to make the two wallboards tightly connected, and install them row by row in sequence.
Interlocking installation method: For WPC with interlocking edges For wall panels, first apply adhesive on the back of the wall panels or the wall surface, align the interlocking edges of the two wall panels, and then push them hard to make them bite and clamp each other to form a stable connection. Also install them row by row.
Edge treatment
Install decorative strips: Install decorative strips such as top corners, skirtings, and edge strips at corners, tops, and bottoms of walls to cover the edges and gaps of wall panels and enhance the aesthetics. Adhesives or nails can be used for fixing.
Sealing treatment: As needed, seal the gaps between wall panels and the intersections between wall panels and other objects, such as door and window frames, with sealants or caulking agents to prevent dust, moisture, etc. from entering the gaps and affecting the service life and overall effect of the wall panels.
Post-installation inspection
Cleaning: After installation, clean up adhesives, dust and other debris on the surface of the wall panels in time to keep the wall panels clean and tidy.
Inspection: Check whether the wall panels are installed firmly, whether the surface is flat, whether there are problems such as looseness, warping, uneven gaps, etc., and make adjustments and repairs in time if necessary.